

Chapters
Browse all chapters
Getting started
Editing
Site & domains
Billing & account
AI
FAQ
Pages
Pages is where you add, rename, reorder and publish every page of your site. The tab a page sits in decides which menu shows it.
Page groups
| Tab | What it holds |
|---|---|
| Main | Pages in the main navigation bar. Nest a page under another to make a drop-down. |
| Footer | Links shown in the footer menu, such as Privacy Policy and Terms of Use. |
| Standalone | Pages that are not in any menu but can be linked to (a landing page for an ad, a thank-you page). |
| Links | Menu items that point to another page or website, plus the automatic redirects list. |
| Template | The layouts used for every blog post, product page, blog list and products list. |
| Your own groups | Add group creates one (for example "Resources"). Rename or delete it from its tab menu; deleting asks where to move its pages. |
New page creates the page in the tab you are looking at.
Create a page
- Open the tab the page belongs in and press New page.
- Type a Page name. The Page slug (the part after your domain) fills itself; edit it if you like.
- Press Create. The editor opens on the empty page.
- Fill it with Choose a starter, Generate this page with AI, or Add section (see The page editor).
Pages start as Draft. They go live when you publish.
The page row
Each row shows the name, the URL, the status and a few controls:
- Pencil icons (on hover) rename the page or edit its slug in place.
- Lock icon turns write protection on. A write-protected page cannot be changed, by you or by an AI assistant, until you Unlock it.
- Edit opens the page editor.
- ⋯ opens the page menu.
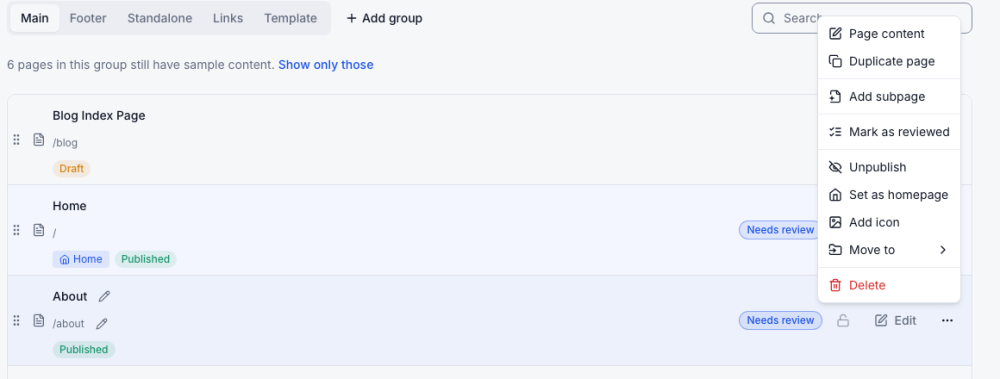
| Menu item | What it does |
|---|---|
| Page content | Opens the editor |
| Duplicate page | Copy makes an independent copy; Keep shares the same sections, so an edit in one shows in both |
| Add subpage | Creates a page nested under this one |
| Mark as reviewed | Clears the Needs review badge on a starter page |
| Publish / Unpublish | Puts the page live, or takes it off the site |
| Set as homepage | Makes this page the one at / |
| Add icon | Shows an icon next to the menu item |
| Move to | Moves the page to another group, or makes it standalone |
| Delete | Removes the page after you confirm |
Subpages and reordering
Drag a row by its grip (⠇) to reorder the menu, or drop it onto another row to nest it. To move a page to another group, drag it onto that group's tab at the top; the tab lights up and the page moves when you let go. Undo in the confirmation message puts it back.
To start a subpage directly, open the parent's ⋯ menu and choose Add subpage. Its suggested URL starts with the parent's (for example services/wedding-cakes).
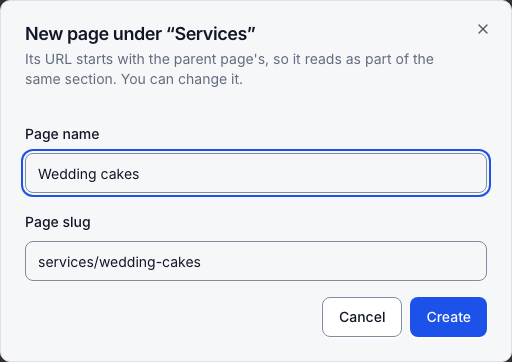

The homepage cannot have subpages. When you move a page under a new parent, Webmarlin offers to change its URL to match; Apply accepts, Keep the current URL declines.
Change a URL without breaking links
Rename a published page's slug and Webmarlin keeps its old address working. Visitors and search engines that use the old URL are sent to the new one with a permanent (301) redirect.
- Hover the page row and click the pencil next to its URL.
- Type the new slug. The hint reads Old address will redirect here automatically.
- Press Enter.

The redirect appears under Links → Automatic redirects and goes live with your next publish.

- Changing a parent's URL offers to update its subpages too; each published subpage gets its own redirect.
- Redirects never chain: renaming twice points the oldest address straight at the newest.
- The trash icon deletes a redirect. After the next publish the old address shows "page not found".
- A site can hold up to 500 redirects; the counter under the table shows how many are used.
- Only a page that was live gets a redirect. Renaming a draft that was never published adds nothing.
Menu links
In the Links tab, New link adds a menu item that points somewhere else, such as your online ordering service. Choose Permanent (301) for a final move or Temporary (302) while it may change. You do not need a link for a renamed page; that redirect is automatic.
Page settings and SEO
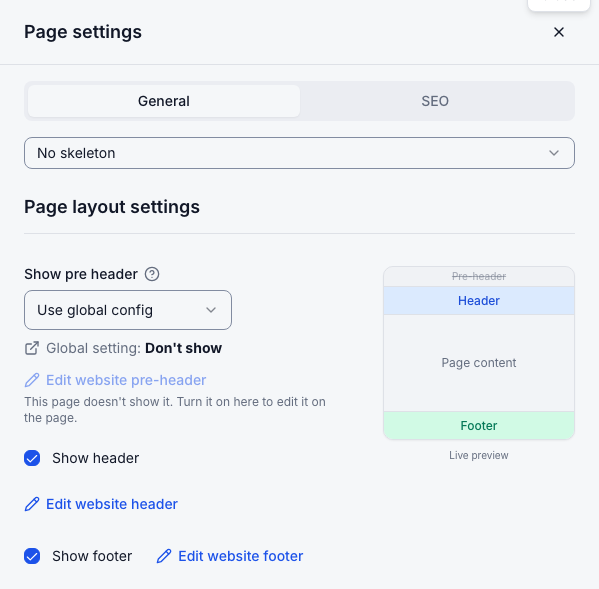
In the editor, Page settings opens two tabs.
General chooses whether this page shows the pre-header, header and footer. Each can follow the site-wide setting or be switched for this page, and the Edit website header / footer links open them for editing.
SEO controls how the page appears in search results and when shared.
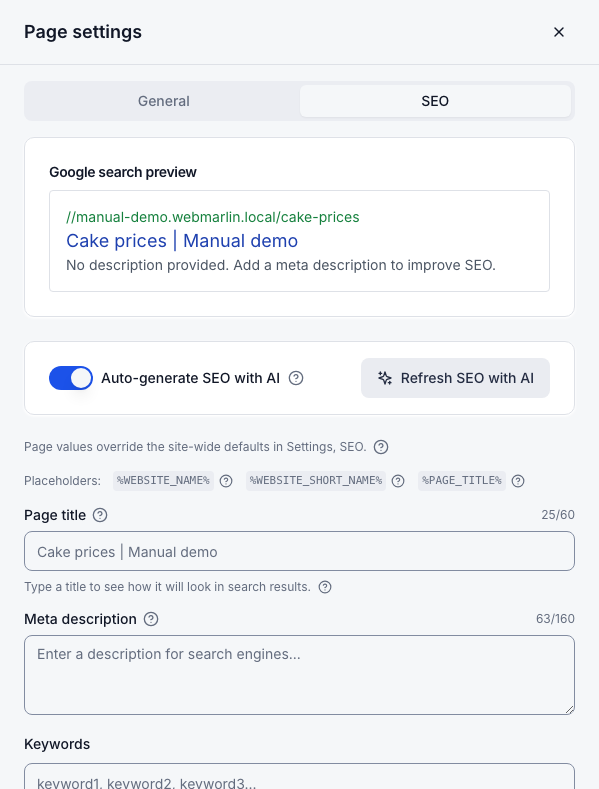
| Field | Tip |
|---|---|
| Google search preview | Updates as you type |
| Auto-generate SEO with AI | On by default. The AI writes title and description from the page; Refresh SEO with AI redoes it now |
| Page title | Up to 60 characters. Placeholders such as Webmarlin Help are filled in for you |
| Meta description | Up to 160 characters, one or two plain sentences |
| Show in search results | Turn off to keep a page out of Google |
| Social media (Open Graph) | Title, description and a 1.91:1 image (at least 1000 px wide) for link previews |
| Structured data | A Schema.org type that helps search engines understand the page |
Page values override the site-wide defaults in Settings → SEO.
Publish and unpublish
- Publish in the editor puts that page's current version live.
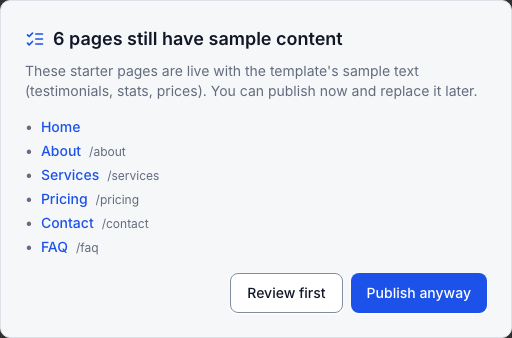
- Publish in the top bar publishes the whole site. If starter pages still have sample text, it lists them first: Review first or Publish anyway.
- Unpublish in the page menu takes one page off the site; its menu item disappears.
While it works the button reads Regenerating SEO before publish…, then Publishing…; the live site refreshes within about 30 seconds.