

Chapters
Browse all chapters
Getting started
Editing
Site & domains
Billing & account
AI
FAQ
Help › Site & domains › Shop
Shop
The shop sells physical and digital products on your site, with checkout through your own Stripe account. It needs a plan that includes the online shop.
Turn the shop on
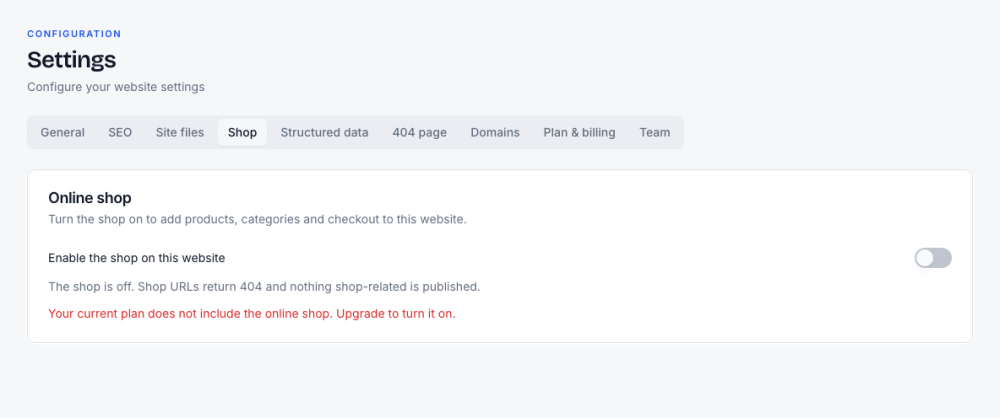
The shop is switched on per website in Settings → Shop. On a plan without the shop the switch is locked with Your current plan does not include the online shop. Upgrade to turn it on. While it is off, shop addresses return "not found" and nothing shop-related is published.
With the shop on (screenshots not available on the free plan used for this manual):
| Area | What you do there |
|---|---|
| Products | Add a product: name, price (at least $0.50), images, stock, SKU, physical or digital (digital products need a file). Duplicate a product to start the next one |
| Variants | Fields marked Buyer option in a category (size, colour…) become variants. One row per combination; untick a row to stop selling it |
| Categories | Group products and define custom fields every product in that category fills in (text, number, checkbox, select) |
| Orders | See paid, refunded and cancelled orders; Fulfill an order or issue a full or partial refund |
| Shop settings | Currency (USD, EUR, CAD, AMD), flat shipping rate and a free-shipping threshold, tax, and the Stripe connection |
Checkout runs on Stripe. Connect your Stripe account in the shop's Payments settings; until Stripe enables charges, the shop shows Charges disabled.
Connect Stripe
Payments go straight to your own Stripe account through Stripe Connect; Webmarlin never holds your money.
- Open Shop → Shop settings (or the Stripe card in Settings → Shop) and press Connect Stripe.
- Finish Stripe's onboarding in the page it opens.
- Back in Shop settings, press Refresh status. The badges read Connected, Charges enabled, Details submitted and Checkout enabled when you are ready.
If Stripe still needs details, Continue onboarding takes you back there. The shop can stay on while you finish.
Shop settings
| Setting | What it does |
|---|---|
| Currency | The currency of every price. Changing it converts nothing: check your prices and shipping amounts afterwards. |
| Flat shipping rate | Charged once per order that contains a physical item |
| Free shipping over | Order total above which shipping is free; leave empty to always charge |
Add a product
- Open Shop → Products and press New product.
- Under Basics, give it a Name (the Slug follows), a Category, and Status: Draft or Published.
- Set the Price. Compare-at price shows an old price crossed out; SKU is optional.
- Choose Type: Physical, or Digital with the file buyers download.
- Add a Featured image and more pictures to the Gallery.
- Fill Details, the extra fields the category asks for (see below).
- Press Create product.
The ⋯ menu on a product row has Edit, Publish or Unpublish, Duplicate and Delete. Search finds products by name or slug.
Variants and stock
When the product's category has buyer options (for example Size and Colour), the form shows Variants: one row per combination.
- Untick a row to stop selling that combination.
- Give a row its own SKU or a Price override; empty rows use the base price.
- Tick Track stock to enter a Stock count per row.
Categories and custom fields
Shop → Categories groups products and gives each group its own fields.
- Press New category, enter a name (the slug follows) and press Create.
- Drag categories to reorder or nest them, or use Move up, Move down, Move into the category above and Move out one level in the ⋯ menu.
- Choose Edit fields to add fields every product in the category fills in. Each field has a Label, a Key (lower_case_with_underscores), a Type, and switches for Required, Filterable and Buyer option.
- A Buyer option must be a select field with its options listed, comma-separated. Buyer options become the variant rows described above.
A field's key locks once products use it. Removing a field deletes the values products saved for it. Deleting a category keeps its products, without the category.
Orders
Shop → Orders lists every checkout on your published site with its date, email, total and status. Open one to see the items, shipping address, totals and a timeline.
| Status | Meaning | What you can do |
|---|---|---|
| Pending | Checkout started, not paid | Wait |
| Paid | Payment received | Fulfill once you ship or hand it over; Refund |
| Fulfilled | Marked as sent | Refund |
| Refunded | Money returned | Nothing |
| Canceled | Cancelled | Nothing |
Refund asks for an amount; leave it empty for a full refund. Refunds go through your Stripe account and cannot be undone. View payment in Stripe opens the payment there. Webmarlin emails you each new order and sends the buyer a receipt (see Notifications and emails).
(Screenshots not available: the shop needs a paid plan, and the manual's demo site is on Starter.)