

Chapters
Browse all chapters
Getting started
- Getting started
- Finding your way around
- Real-world walkthroughs
Editing
Site & domains
Billing & account
AI
FAQ
Help › Getting started › Real-world walkthroughs
Real-world walkthroughs
Five complete tasks, start to finish, done on a demo bakery site for this manual. Each one takes 5 to 30 minutes.
1. Launch a bakery site
Goal: a live site with your own words, logo and contact details, in about 30 minutes.
- All websites → New website. Name it ("Corner Bakery"), keep the suggested subdomain or type
corner-bakery, and pick Restaurant as the industry. Press Create & continue. - Plan: choose Starter to begin free; you can upgrade later.
- Template: pick one from Recommended for Restaurant, for example Canvas. Use Preview to compare.
- Info: write two sentences about the bakery, who it serves, Warm as the voice, your products one per line, and anything the AI must never claim ("gluten-free"). Press Complete setup.
- On the dashboard, Review your starter pages lists Home, About, Services, Pricing, Contact and FAQ. Open Home.
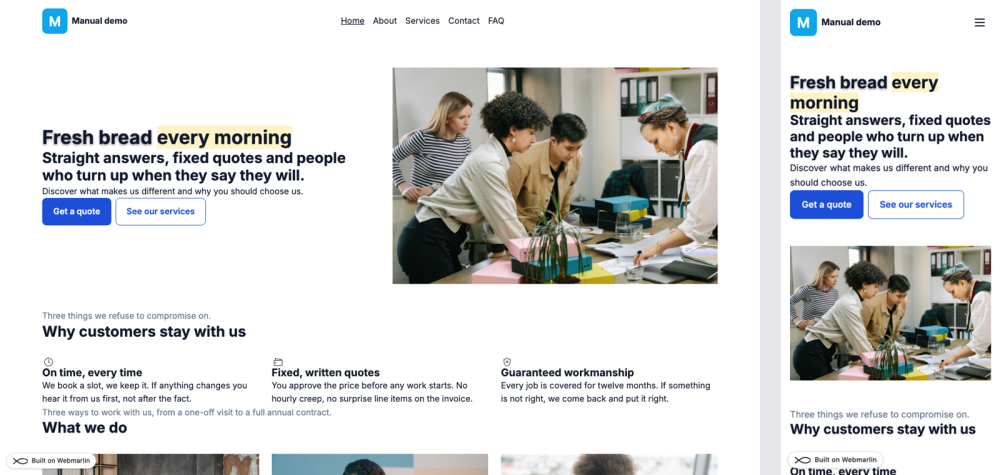
- Click the hero headline and type your own: Fresh bread every morning. Click the photo and choose Search stock photos ("bakery") or upload your own. Do the same for each section, or delete sections you do not need.
- Settings → General: upload your logo (and a light version for dark backgrounds), add phone, email, address and social links. These fill the footer and contact sections. Press Save settings.
- Work through the other starter pages. Editing a page clears its Needs review badge; for a page that is fine as it is, use ⋯ → Mark as reviewed.
- Press Publish in the top bar. If sample text remains, choose Review first or Publish anyway. The site is live in about a minute.
- Optional: connect your own domain in Settings → Domains (CNAME to
sites.webmarlin.com).
2. Add a pricing page from a starter
Goal: a "Cake prices" page with three sizes, what is included and ordering questions.
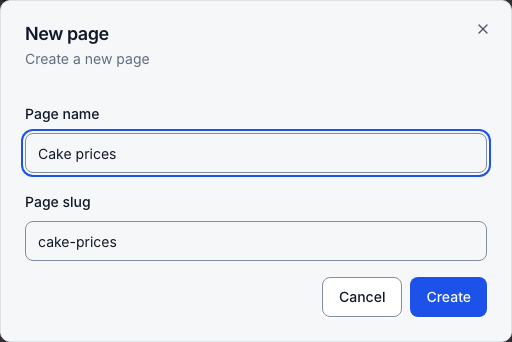
- Pages → Main → New page. Name it Cake prices; the slug becomes
cake-prices. Press Create.
- On the empty page, press Choose a starter.
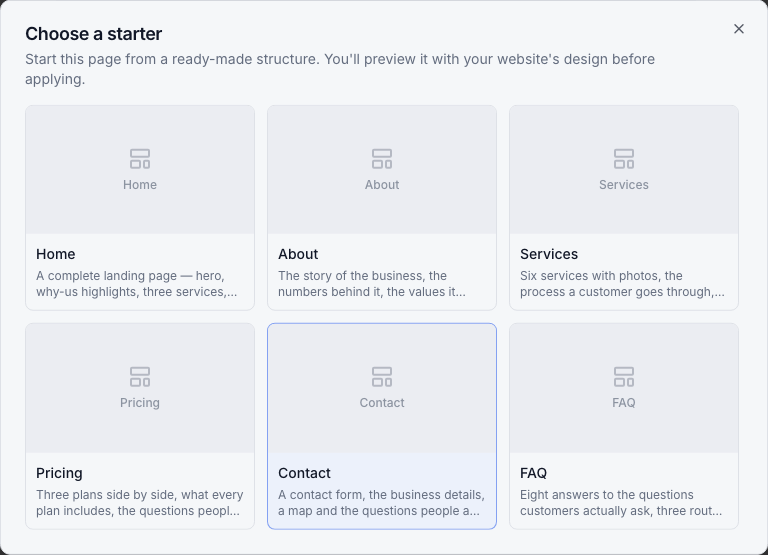
- Pick Pricing. The page previews in your site's design. Back to starters tries another; Use this page applies it.
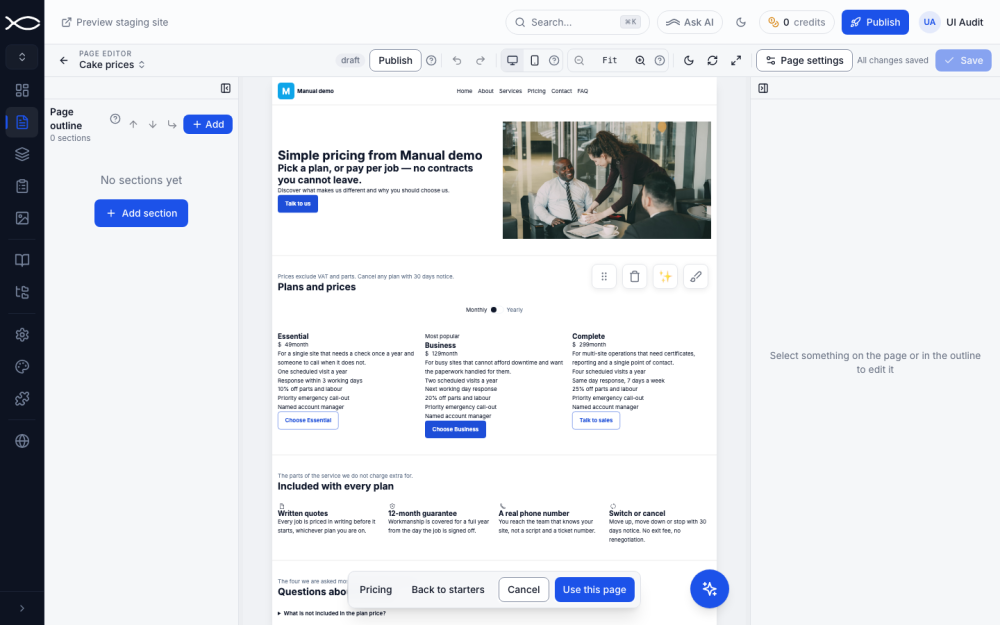
- Click each plan in the pricing section and rename it: 6-inch, 8-inch, 10-inch. Set the prices and the lines under each. Replace "Included with every plan" with what comes with every cake (message on top, candles, box).
- Edit the FAQ answers: order notice, delivery, allergens.
- Press Save, then Publish in the editor. The page is in the Main tab, so it appears in the menu.
Tip: the AI route is faster. Press the sparkle button and write "Cake price list with 6, 8 and 10 inch sizes from £25, what's included, and a FAQ about ordering."
3. Move a page and keep old links working
Goal: rename /about to /our-story without breaking links on Instagram, Google or printed flyers.
- Open Pages and hover the About row.
- Click the pencil next to
/about, typeour-story, and press Enter. The hint confirms Old address will redirect here automatically. - Open the Links tab. Under Automatic redirects you see
/about → /our-story, reason Renamed page. - Press Publish.
- Test it: open your old address,
your-site/about. It now lands on/our-story(a permanent 301 redirect, so Google moves its listing too).

To move a page under another in the menu, drag it onto that page's row. Webmarlin offers to change its URL to match (for example /services/wedding-cakes); if you accept, the old URL redirects the same way. To move it to another menu group, drag it onto the group's tab.
4. Restyle a headline
Goal: make "every morning" stand out in the hero headline.
By hand (no credits needed):
- Open Home in the editor and click the headline.
- Select every morning. Click Highlight and pick a soft theme colour (the demo uses Warning Light, a cream).
- Select Fresh bread, click Text effect and choose Shadow (or Glow, or Outline).
- Zoom in (⌘+) to check it, and press the moon to see it in dark mode.
- Save, then Publish.
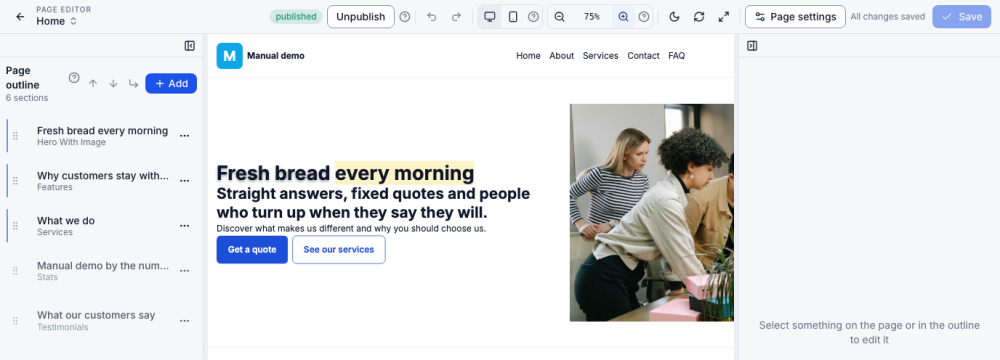
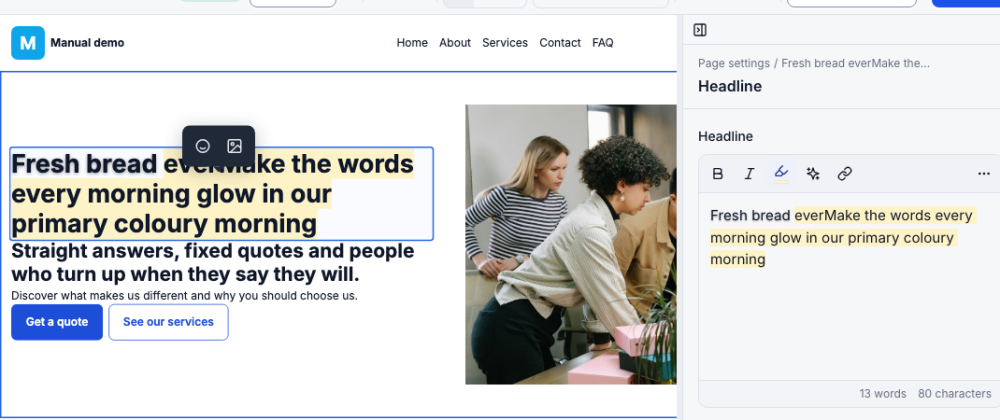
With AI:
- Click the hero section, then its sparkle (Edit with AI).
- Type "Make the words every morning glow in our primary colour." and press Apply.
- Check the draft, then Save and Publish. If you do not like it, Undo or Discard.
5. Archive an old site
Goal: take last year's pop-up shop site offline without losing it.
- If the site is on a paid plan, cancel it first in Settings → Plan & billing and wait until the paid period ends.
- On All websites, open the site card's ⋯ menu and choose Archive…
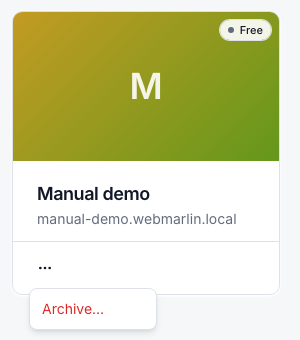
- Type the site name to confirm and press Archive website.
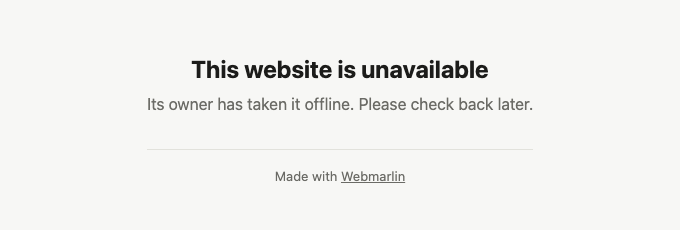
- The site moves to All websites → Archived. Visitors now see a plain "unavailable" page.
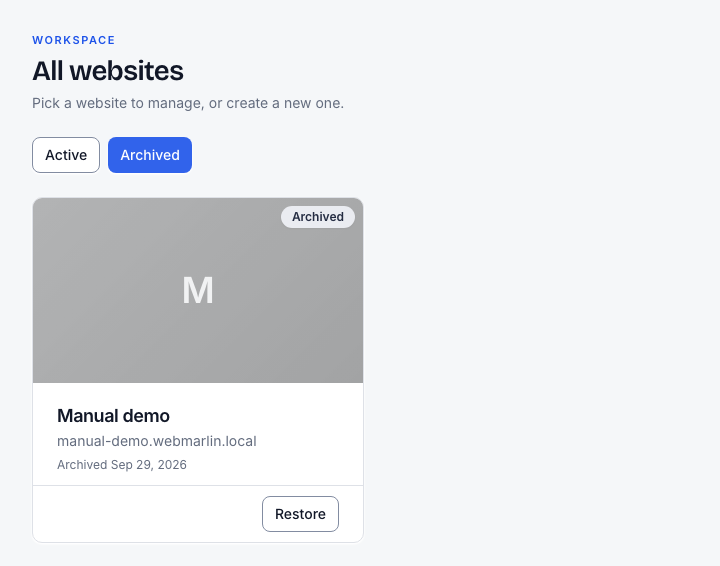
- Need it back next season? Press Restore. It returns exactly as it was, with the same pages, domains and settings.