

Chapters
Browse all chapters
Getting started
Editing
Site & domains
Billing & account
AI
FAQ
Help › Billing & account › Plans and billing
Plans and billing
Each website has its own plan; your cards, invoices and AI credits belong to your account. Only the site's owner sees Plan & billing. Payments run through Stripe, and Webmarlin never sees your card number.
Your plan and usage
Settings → Plan & billing shows what the site uses against its plan, and the plans you can switch to.
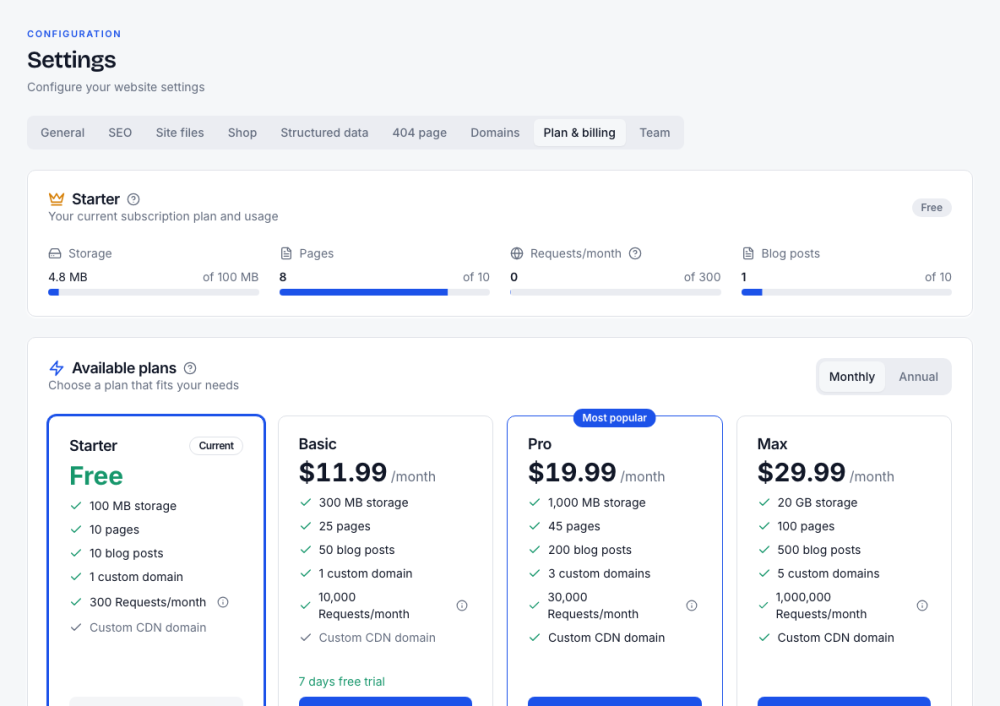
| Limit | What counts |
|---|---|
| Storage | Every image and file in Media |
| Pages | All pages in every group |
| Blog posts | All posts, drafts included |
| Requests/month | Visits: one per visitor per 6 hours, reset each month |
| Custom domains | Domains assigned to the site |
Prices shown in this manual's screenshots are examples; the plan step always shows current prices. Choosing a paid plan opens Stripe checkout; you can leave the page while it finishes, and the plan switches on by itself once Stripe confirms the payment (screenshot not available). Annual billing saves compared with monthly.
What happens when a site gets more visits than its plan allows is explained in Troubleshooting and FAQ.
The plan cards also show each plan's storage, pages, blog posts, custom domains, monthly visits and whether a custom CDN address is included. Going over a limit never takes the site down; it stops you adding more until you upgrade.
Change plan
- Open Settings → Plan & billing and choose Monthly or Annual above the plan cards.
- Press Select Monthly (or Select Annual) on the plan you want.
- Check Confirm plan change: the new plan, billing cycle, price and Due now. When you move between paid plans, it also shows the credit for unused time on the old plan and the prorated charge; you pay only the difference for the days left.
- Pick a saved card, or Add payment method.
- Press Confirm upgrade.
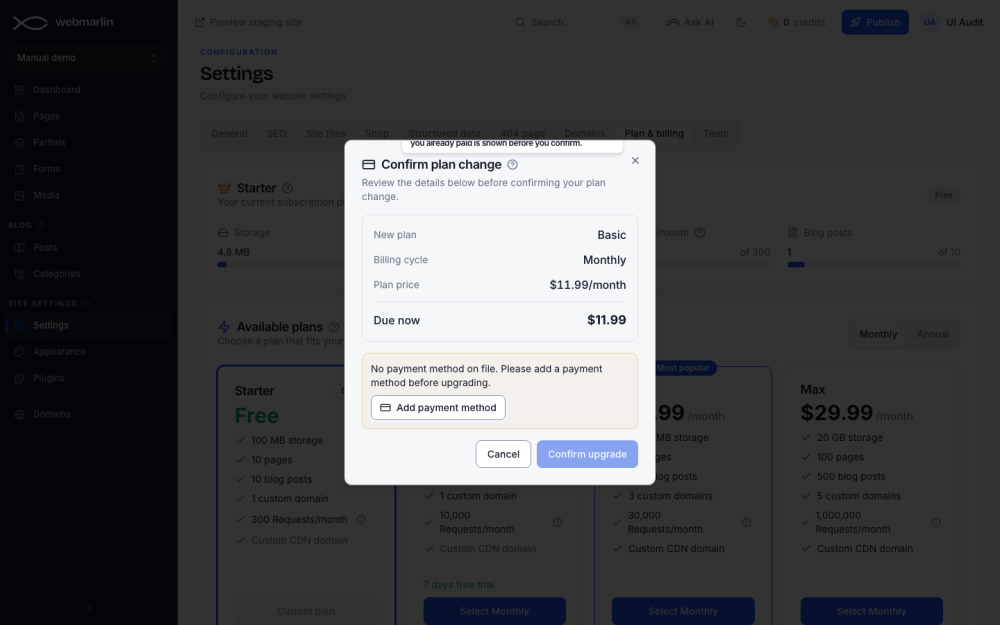
Some plans start with a free trial, shown on the card. If Stripe needs you to finish checkout on its page, you return to Payment confirmed or Still processing; you can leave, and the plan switches on by itself once Stripe confirms. Leaving Stripe's page without paying shows Checkout not completed and nothing is charged.
If a payment is unfinished or a renewal charge fails, a banner across the console says Payment pending (with Resume checkout) or Payment past due (with Update payment).
Cancel or resume
- In Plan & billing, press Cancel subscription at the bottom, then confirm.
- The plan stays active until the end of the period you paid for; the page shows the date. After it, the site moves to the free Starter plan instead of going offline.
- Changed your mind before that date? Press Resume.
Payment methods
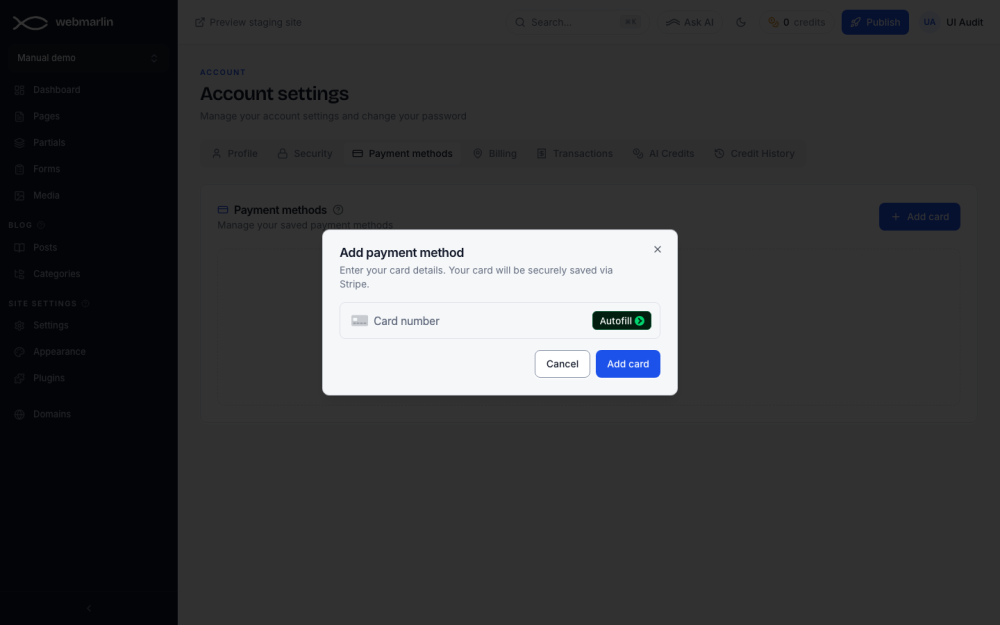
Account settings → Payment methods holds the cards used for plans, domains and credits. Open it from your initials at the top right.
- Add card opens a secure Stripe card form.
- Set default chooses the card for automatic charges, such as renewals.
- The bin removes a card after you confirm.
Billing address and invoices
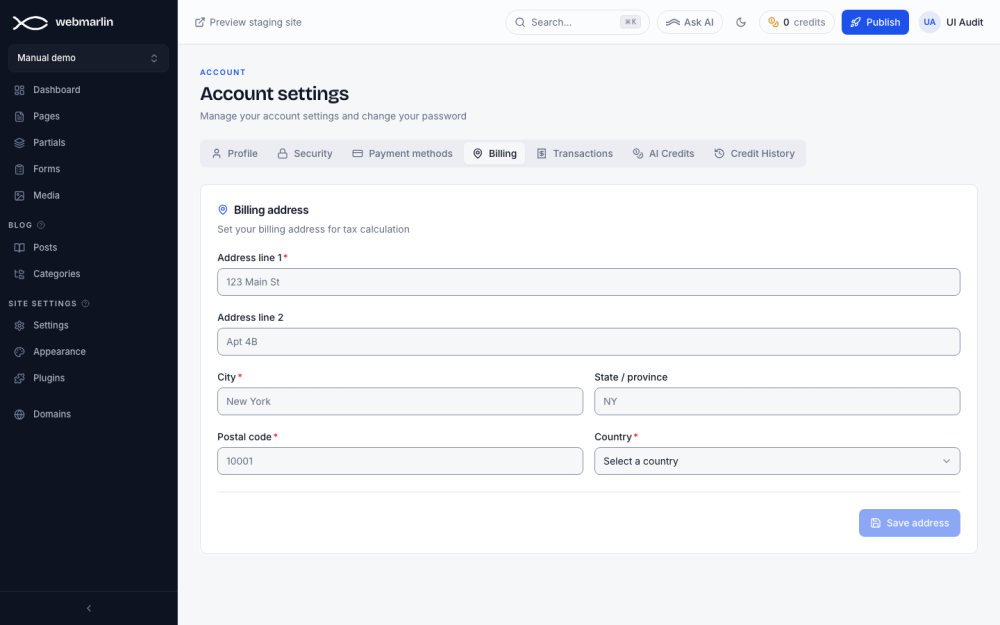
Account settings → Billing stores the address used for tax: address lines, city, state or province, postal code and country. Press Save address.
Account settings → Transactions lists every charge, newest first: date, type, description, amount, tax and status (Completed, Pending, Failed or Refunded). The Invoice link opens the Stripe invoice in a new tab.